In my last post I mentioned that I’d picked up a Rockwell worm drive circular saw from the flea market. I tested it at the flea market and it ran fine. At some point, the previous owner had cut through the cord and fixed it by using wire nuts and a roll of red electrical tape to connect it to a smaller gauge cord. As with most every used thing I get I decided to tear it down and clean it up.


Unwrapping the electrical tape wouldn’t be worth it. Instead, I just cut both cords and threw the wad of tape away. Now I can get to disassembling the saw. The first step was to remove the blade. There’s no arbor lock on this saw and when I jammed the blade it just slipped getting me no where. To make quick work out of it, I pulled out the impact. Note that this nut is reverse threaded which means that clockwise loosens it. This is done because using the saw will tighten the nut as opposed to loosening it.

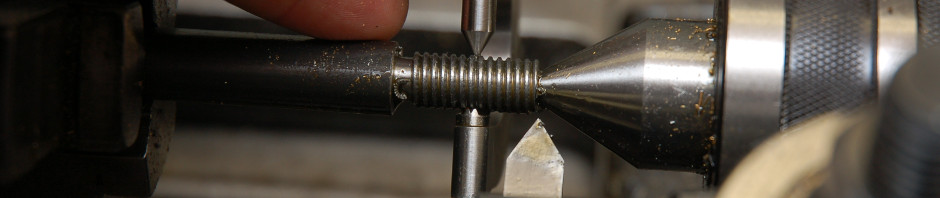
If you’re curious, here’s the worm gear that earns the saw its name. The gears run in an oil bath and this picture is taken through the fill port. Regular circular saws have the motor mounted perpendicular to the saw blade. Worm drive saws have the motor mounted parallel to the blade. 
With the blade off you can see some of the muck on the saw. This muck is a mixture of the gear oil and saw dust. I’m taking this to mean that oil is leaking from somewhere.

I clamped the saw in my vise to make taking it apart easier. There are three machine screws and a bolt that hold the gear box to the aft handle portion of the saw. Before the two parts can be separated the foot plate, fore handle, and upper blade guard need to be removed. The handle is held on by another Phillips screw and one of the machine screws that connects the gear box to the aft handle.
The foot plate comes off by removing a bolt and the front and back of it. The rear bolt is used for setting the cut depth and requires removing several pieces before the foot plate can be removed. The upper blade guard is held on by three Phillips screws.

The lower blade guard requires several steps to remove it. The first is to remove the diamond shaped washer. Next, the thicker black metal flange can be removed.

Under the flange are two snap rings that must be removed. The first is a small silver one. The second is a larger black one that is under the first snap ring. It was covered in muck and I missed it at first.

With all this out of the way the lower blade guard can be removed. This reveals the spring that keeps the lower blade guard closed. It too can be removed and set aside.

Finally, the gear box and aft handle sections can be separated. Guess what was packed in the area around the stator? Yup, more of the oil and sawdust mixture. There was a large amount of sawdust caked in here. It took a lot of scraping and vacuuming to get it out. I used a dental pick which was able to fit between the case and stator to dig the sawdust out.

Once I was done cleaning the saw dust out of the aft handle, I turned my attention to the gear box. As you can see the armature is attached to this portion. On the armature’s arbor is the rear bearing and fan. I can’t see it but there should also be another bearing and oil seal in front of the fan. I think this oil seal is probably leaking and causing most of the caked saw dust. I don’t know that I can find another seal so I’m going to leave it alone.

Under a layer of muck is a shield which is held in by a couple of screws.

With the shield removed, we find even more sawdust which has to be scraped and vacuumed out.

There’s a channel that runs up to the front of the blade that also needed cleaning. I think this channel ducts air up to the front of the blade to blow sawdust out of the way as you’re cutting. To clean it required removing a stamped metal shield. There’s a gasket under here that I was careful to avoid damaging.

I’m still working on this saw and will update when I have more to post.
Part 2: https://somanyhobbies.wordpress.com/2014/03/22/rockwell-worm-drive-circular-saw-part-2/

I have the same saw, I bought it new 34 years ago. Can you read the model # on yours?, mine the tag is long gone and I am looking for parts? Thanks Steve
Steve,
My saw is a Model 568. Good luck fixing yours!
David
any advice on where to get a good replacement blade…I have the Model 568 and need the 7 1/2 blade
I think I found my blade at Lowe’s. I’d imagine Home Depot or a regular hardware store would have a 7 1/2″ blade as well.
Any idea where to get the motor brushes? I just came into possession of one of these saws and I’d like to refurbish it. Your blog has some great pictures on tear down.
Hi. How did you get the blade off using an impact? Mine just spins in both directions! Thanks! Ken
My impact hit fast enough that it didn’t have much of a chance to spin. The only thing I’d suggest is to find a better way to hold the blade. Jam something in a tooth gullet or try pinching the blade with some vise grips. Multiple overnight sprays of some kind of penetrant would help too.
I have one of these saws that I bought new many years ago. It’s in perfect condition except that I got it out to use the other day and noticed that the blade guard was broken. The guards of course are not available anymore. I would like to sell it unless someone out there happened to have an old saw with a good guard on it that they would sell.
Doug, Two years later, i wonder if you still have the saw? I have one with a bad bearing near the blade and am unable to remove the casting. Need a puller, probably. Is yours still for sale? I Like my saw.
No. I don’t have the saw any more. I found a good deal on a Rockwell 14″ bandsaw and upgraded. You can barrow bearing pullers from an autoparts store for free.
Did you ever finish it up?
I did. Find part 2 here: https://somanyhobbies.wordpress.com/2014/03/22/rockwell-worm-drive-circular-saw-part-2/
I have 1 for sale!contact me at ssav221@aol.com