A while back I picked up an old 1940s Zenith radio. It uses vacuum tubes unlike radios today. Of course when I found mine it didn’t work and was well worn. Here’s a pic of it when I bought it. The wood veneer had been damaged in multiple places and it appeared that the edge had suffered a little water damage. The wooden “feet” that are supposed to stick out at the bottom had both been broken. One of the knobs was missing and the other damaged. The translucent yellow wheels rotate separately from the black knobs. The knob’s function on the left is on/off and volume. The wheel on the left adjusts the tone of the radio which seems to just increase the treble slightly. On the other side, the knob adjusts the tuning frequency and the wheel adjusts the band.

Here’s a close up of the right hand corner. This radio has three bands: Std Broadcast (AM), FM 100 (today’s FM band), and an older FM band extending from 42-49 Mhz which is no longer in use. Also in this picture are replacement “feet” I made for the radio out of some red oak.

Here’s a picture of the back showing the hookups for external antennas. The power cord comes out of the hole on the lower left but had been cut off by someone. That’s not a bad thing though because the old cords apparently had a good amount of resistance in them resulting in them heating up. When the coating broke down and the heated up…it could be bad.

The back can be removed after taking out four screws. After removing four more screws from the bottom the chassis can be removed from the housing. The top of the chassis is pretty clean.

Here’s a better view of the tubes. Note that the silver metal can at the far right isn’t a tube. It contains some capacitors for cleaning up the converted DC electricity. More on that in a bit.

Underneath the chassis is a little messy though. Here’s a couple of pictures. The plastic rectangles and multicolored plastic cylinders are resistors. They hold up well over time. The paper cylinders are capacitors and, over time, they tend to dry out and die. They’re the main source of problems on old radios. Obviously, there are other bits and pieces but those are the main two.


If you’re lucky, and I was, you can find a schematic available for free online. Once you have it you can go through and identify everything. I took a picture of the bottom, printed it out, and labeled it to make replacing things easier.

There’s a good chance all of the capacitors are dead or will be soon once you try to run the radio again. So, it is best just to replace them all. One at a time I removed and replaced the old paper capacitors with new “orange drop” capacitors. If you look around online you can find them from multiple sources for pretty cheap.

Here’s the view after I’d replaced most of the capacitors. The big one in the middle isn’t hooked up so I left it in there. I left a few paper ones in there because I didn’t have the right size replacements. I did remove and test them though. If you look in the lower right hand corner you’ll see some black cylindrical capacitors. These are electrolytic capacitors that clean up the converted DC electricity for the radio. The capacitors that they replace are all crammed into the metal can I noted above.

Here’s a closer view of them. I’ve taped over the ends to make sure they don’t contact anything.

The top remains pretty much untouched. I replaced some wire whose coating was coming off.

To repair the case I mixed up a blend of stains to closely match the original color. Next, I lightly sanded the entire surface except for the areas around the knobs with the script. I had no way to replace them that would match the original.

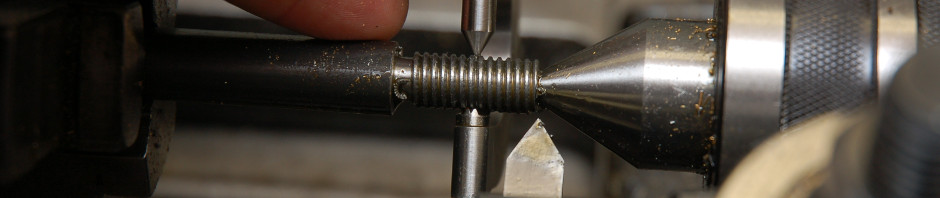
Here’s the radio put back together. I looked around for some replacement knobs but didn’t find any I liked. One of these days I plan to turn a couple now that I have a lathe.

So, does it work? Check out the video below.
Update:
I thought I’d add a few more pictures. Here’s a view of the top of the cabinet showing some of the damage before restoration.

Here’s a view of the inside of the cabinet. The white pad is asbestos and helps to keep the heat away from the cabinet. I’d read that you could seal the asbestos up using a clear coat spray paint to make it safer. I haven’t messed with it other than that. If you do find an old radio be aware that it may contain surprises.

The finned object in the metal housing is the air spaced variable capacitor. When you turn the dial to tune the radio, some of the plates move while others stay stationary. This varies the frequency of the signal the radio picks up.

Unlike modern speakers with permanent magnets, my Zenith makes use of an electromagnetic speaker. This type of speaker creates a magnetic field with electricity for the speaker’s voice coil to interact with. This means that you cannot simply swap a new speaker in for an old one without some work.

If you are interested in restoring an old radio there a numerous sites online that provide information and a couple of forums such as antiqueradios.com. One book I found very useful on antique radio workings and repair is “Old Time Radios! Restoration and Repair” by Joseph J. Carr. If you have a desire to restore an old radio, give it a try! Just take you time, do your research, and be mindful of electricity.

I like vintage items! I wonder how much ‘junk’ gets thrown away. If people don’t keep it for the sentimental value, than at least for their worth (no matter how little it is). Enjoyed the post and pics!
Wow that radio is amazing! I actually want to decorate my home in vintage items I absolutely love the look of it!
Katie
http://katieraspberry.wordpress.com/
Yes…I especially like when things work…even if re-purposed.
Nice hobby, and nice work!
This brings back memories. My dad used to work on stuff like this – when that’s all there was.
It would be nice if the radio images could be freely used, without worrying about copyright issues, in technical ebooks that could show what a vacuum tube radio and hand-wiring actually looked like!
The documentation and literature for virtually everything that runs on vacuum tubes, with the exception of some of the absolute latest stuff produced in the ’60s, is long since in the public domain. Schematics, original advertisements, original manuals and service information, and any original photographs taken around that time period. The only real copyrighted images would be modern images people have taken of old radios, or newly drawn schematics.
Nice restore on this old classic. I am always amazed at how far we’ve come from a tube based radio to a device that uses 40nm chips and fits in the palm of my hand. And it does more than just stream music, but does voice and data too!
Thanks for this blog. I have my great-grandmothers 40’s radio and was wondering how to get it going again.
It’s always good to see old things still in use. I truly like the look of things like the radio you shared with us since you truly can’t find anything like it anymore.
Awesome. Wish they taught stuff like that in colleges. Examples like these sure beat drab lectures.
Jealous beyond belief. Great work. Keep it for your grandkids!
Seems pretty forward-looking for a radio this old to have the modern FM 100 band. Nice find, and nice to see this old radio working again!
Reblogged this on TriboTupi.
wow…..its cool…
You so remind me of my brother David, he has similar hobbies. He restored a bowling machine. His house is like a museum for most. Thanks for sharing! 😉
It would be cool to have this, since I like vintage stuff. 🙂
——————–
colorado springs divorce lawyers
Yes, but when you turn it on does it play 1950s radio shows? 🙂
When I was young
I’d listen to the radio
Waitin’ for my favorite songs
When they played I’d sing along
It made me smile.
Those were such happy times
And not so long ago
How I wondered where they’d gone
But they’re back again
Just like a long lost friend
All the songs I loved so well.
Very annoying to see what used to be an everyday object in your home, now called the equivalent of an antique. Anyway, many, many thanks for a fabulous story and great pics to support the explanation. Congrats.
Wow! Thanks for the comments everyone! Glad you are enjoying my site!
We have a radio from the 1950s and it looks similar to your hobby construction.
Great post! Familar images. I remember my parent’s tvs were tube jobs when i was younger and having to have my grandfather replace them periodically and using a “cheeter cord” to get to the back and test them. He was an electrical engineer and build my my 1st radio using vaccium tubes.
Sweet!
Reblogged this on pahunter0718.
wonderful post. I enjoyed seeing how you got it going, again.
Freak-y 🙂
Like the fact that it’s a wood tube radio with FM, even more rare than SW sets. I’ve always wanted to build a tube FM for my kitchen, but plans are hard to come by.
wow amazing radio, is it still working.
Have an old PYE radio that I am currently treating for woodworm. The valves still light up, but no station found. Good with timber, not so good with things that flow (water/electricity). Your post is encouraging.
That was me too before I got this radio. I found a book called “Old Time Radios! Restoration and Repair” by Joseph J. Carr that I thought did an excellent job of explaining these old radios. Good Luck!
I’ve been looking into buying antiques and this has been an insightful post to actually help me find what I am looking for.
Reblogged this on Karthikeyan's Blog and commented:
Wow!
Reblogged this on 8BIT.
A very commendable effort. Congrats on FP!
Oh, I love this! My dad was “the” Zenith and Maytag man in Wamego, Kansas! I had a radio very much like this in my bedroom. My son (also an electronics guru) displays it prominently now on top of his piano.
What is the standard DC voltage on this radio? It is strange to not see the open air variable capacitor array. Did you have to do a warm up on the components by slowly bringing the input voltage up to 110v? These radios are fun to take the top off and leave on your desk at work. Electrical engineers will pick them up and ask you what the little light bulbs are for!
The schematic I have says 125VDC comes out of the rectifier. It has been a while since I restored this radio so I don’t recall the exact value. The variable capacitor array can be seen at the top of the third pic. It is just dimly lit. When I first started working on the radio I used a “Dim Bulb Tester” to limit the current the radio sees. These days though I just turn it on and it seem to do fine. If the set is cold then it takes a little while to warm up. Thanks for reading!
I built a vacuum tube HF transmitter during the 90’s, it ran on 400VDC. I still remember how those caps would light up your world if you were not careful while taking it apart! 🙂
An iconic brand that reminds me of my father’s Heathkit hi-fi, a beginning of many of my own most impacting inventions in electronics, communications and computing, as well as entertainment and political branding and advice centered around radio shows and devices of similar origin. Will you accumulate memorobilia on FDR or WWII to match? Thank you for posting.
Intriguing hobbies, great pics, fun watching the works. Congs on the FP!
Really nicely done. Very sensitive to the value of keeping as much as possible of the original, so its actually a ‘real’ 40s radio, not just a new one in an old box.
Love it. Reminds me of my first effort at about age ten. I shocked myself so badly I was flung across the kitchen. I’ve learned a bit since then. Congrats on your freshly pressed.
That’s some nice work! I bought an old radio similar to that one on eBay a few years ago. Got a great price. I considered restoring the innards but after seeing the bird’s nest of parts I decided to go another way. I took a set of USB speakers and took them apart. I put the works inside the radio and now I have a USB old-time radio. The power LED from the speakers lights the dial in a old fashioned yellow glow. When I play the old stations on Live365 through it I feel like I’m back in the old days. I should write a how-to on it soon.
My dad had this Zenith radio. Looking at your picture reminded me of the great times my dad and I had listening on this radio. I wish they still made radios like this, don’t you?
That’s a very underrated radio, I especially like how it has both of the FM bands on it. I don’t replace molded mica caps in my radios either, unless I know specifically they’re bad – saves a bunch of work, and helps keep the alignment intact, but it can be worthwhile to check and change out resistors that have drifted too far off their values. Sounds great in the video!
Cool project!
Very nice restore job. Gee worked on lots of Vacuum tube Stuff over the years.
VE3TE-Len
Thanks for sharing.
I really liked your post, I also have a vintage radio, it’s Pink but it only works well a little while then gets all distorted? Overheats maybe? Well, good for job getting it working, I just enjoy looking at mine.
From ZL1AQ – Many wonderful memories have come rushing back. In 1947 while still at High School – PNBHS – I somehow acquired a Philco 5 valver. I had already delved into basic radio construction with Xtal sets, and regenerative valve receivers – hand capacity included! However it was the Philco that urged me on. Besides the broadcast band, it has excellent coverage of the 80 metre Amateur Radio band. With an active 80 metre Ham Just over the back fence, my keen interest in ham radio has survived all these years, and many more to come, I hope.
Excellent work! I recently restored a Telefunken console radio. Same type of deal. I like the orange capacitors! They look so much better!
hi-tech in its day…great post! 🙂
Seeing this great post is motivating me to get back into fixing up of my old Zenith 1950 TV, with its perfectly round picture tube, which I last had working in 2003. It just came out of storage and needs a veneer overlay on the top of the cabinet, an over-the-air converter box and some electrical TLC. This model has 2 modernistic features recognizable in today’s sets. It was pre-wired to utilize “Phonevision,” something similar to Pay TV (http://gizmodo.com/5322761/phonevision-the-death-of-physical-media-started-in-1951) and it had a Zoom switch to allow you to fill up the circle with the center of the picture instead of the default smaller “Letterboxed” picture.
I LOVE radio! And though I am not technology blessed to be able to restore a piece of history back to working condition, it’s amazing that there are people who can! Loved the pics!
I just ran across a history of the old lower frequency FM band — “Armstrong-licensed”
http://www.wa2ise.com/radios/fm45.html
Interesting history. It reminds me of the move from analog to digital TV.
you are really doing amazing things.this is great.
marg swarnabhoomi
Might be able to use some guitar knobs to replicate the style: http://www.warmoth.com/Barrel-C827.aspx
Great pics! I love vintage items like this. I have a Grundig floor model radio and record player (turntable for 33 and 78 with a 45 speed attachment) purchased about 50 years ago. The veneer is coming off on the bottom from water damage. I replacing the veneer and hoping that the radio, which had awesome sound, still works. Even if it doesn’t, it is slated for a prime spot in my dining room.
Reblogged this on Looking Through The Lens and commented:
This re-post is about a man and his Zenith. I know the feeling owning a 1963 Imperial/Telefunken console type radio. I think it is especially important to note the work done to the interior electrical chassis and very nice orange capacitors to switch out the cardboard ones. I will be posting an article in the coming month about my own radio and the quirks of restoring it, I felt this made a great intro to it. Great job David!
I have several NOS IF cans that are identical to the ones in this radio except the FM section is the standard 10.7MC instead of the 8.6MC present here. I wonder if the cans I have are Zenith models for a newer version of this type of radio?
What is the Dial Lamp number used for the Dial Lamps on this radio? They appear to be rounded and not bayonet one’s but I couldn’t find it anywhere. Thanks for the information. Rich
Hi. Mine uses #1847 bulbs. They’re rounded with a bayonet mount.
Thanks for reading,
David